Learn how to manage your SLYD wallet, add funds, track spending, and optimize your financial operations.
The SLYD Wallet is your central hub for managing finances on the platform. It provides a prepaid balance system for renting compute resources, comprehensive transaction tracking, multiple payment methods, and automated billing features. The wallet ensures seamless payments while giving you full control over your spending.
Set up your payment options
Fund your wallet balance
Automatic funding setup
View your spending records
Adding a payment method to your SLYD wallet is essential for funding your account and managing transactions. Follow these steps to add a new payment method:
In the sidebar navigation, click on "Wallet" to access your wallet dashboard.
Once in your wallet dashboard, navigate to the "Payment Methods" section to view and manage your existing payment options.
Click the "Add Payment Method" button to open the payment method configuration form where you can add credit cards, debit cards, or bank accounts.

Payment methods dashboard displaying your saved payment options and add new payment method button.
When adding a payment method, you'll need to provide valid payment information including card details or bank account information. All payment methods are securely encrypted and stored in compliance with PCI DSS standards. You can set one payment method as your primary option for automatic charges and recharges.
Multiple ways to add funds to your SLYD wallet:
Add funds instantly using your credit or debit card.
Transfer funds directly from your bank account.
Add funds using popular cryptocurrencies.
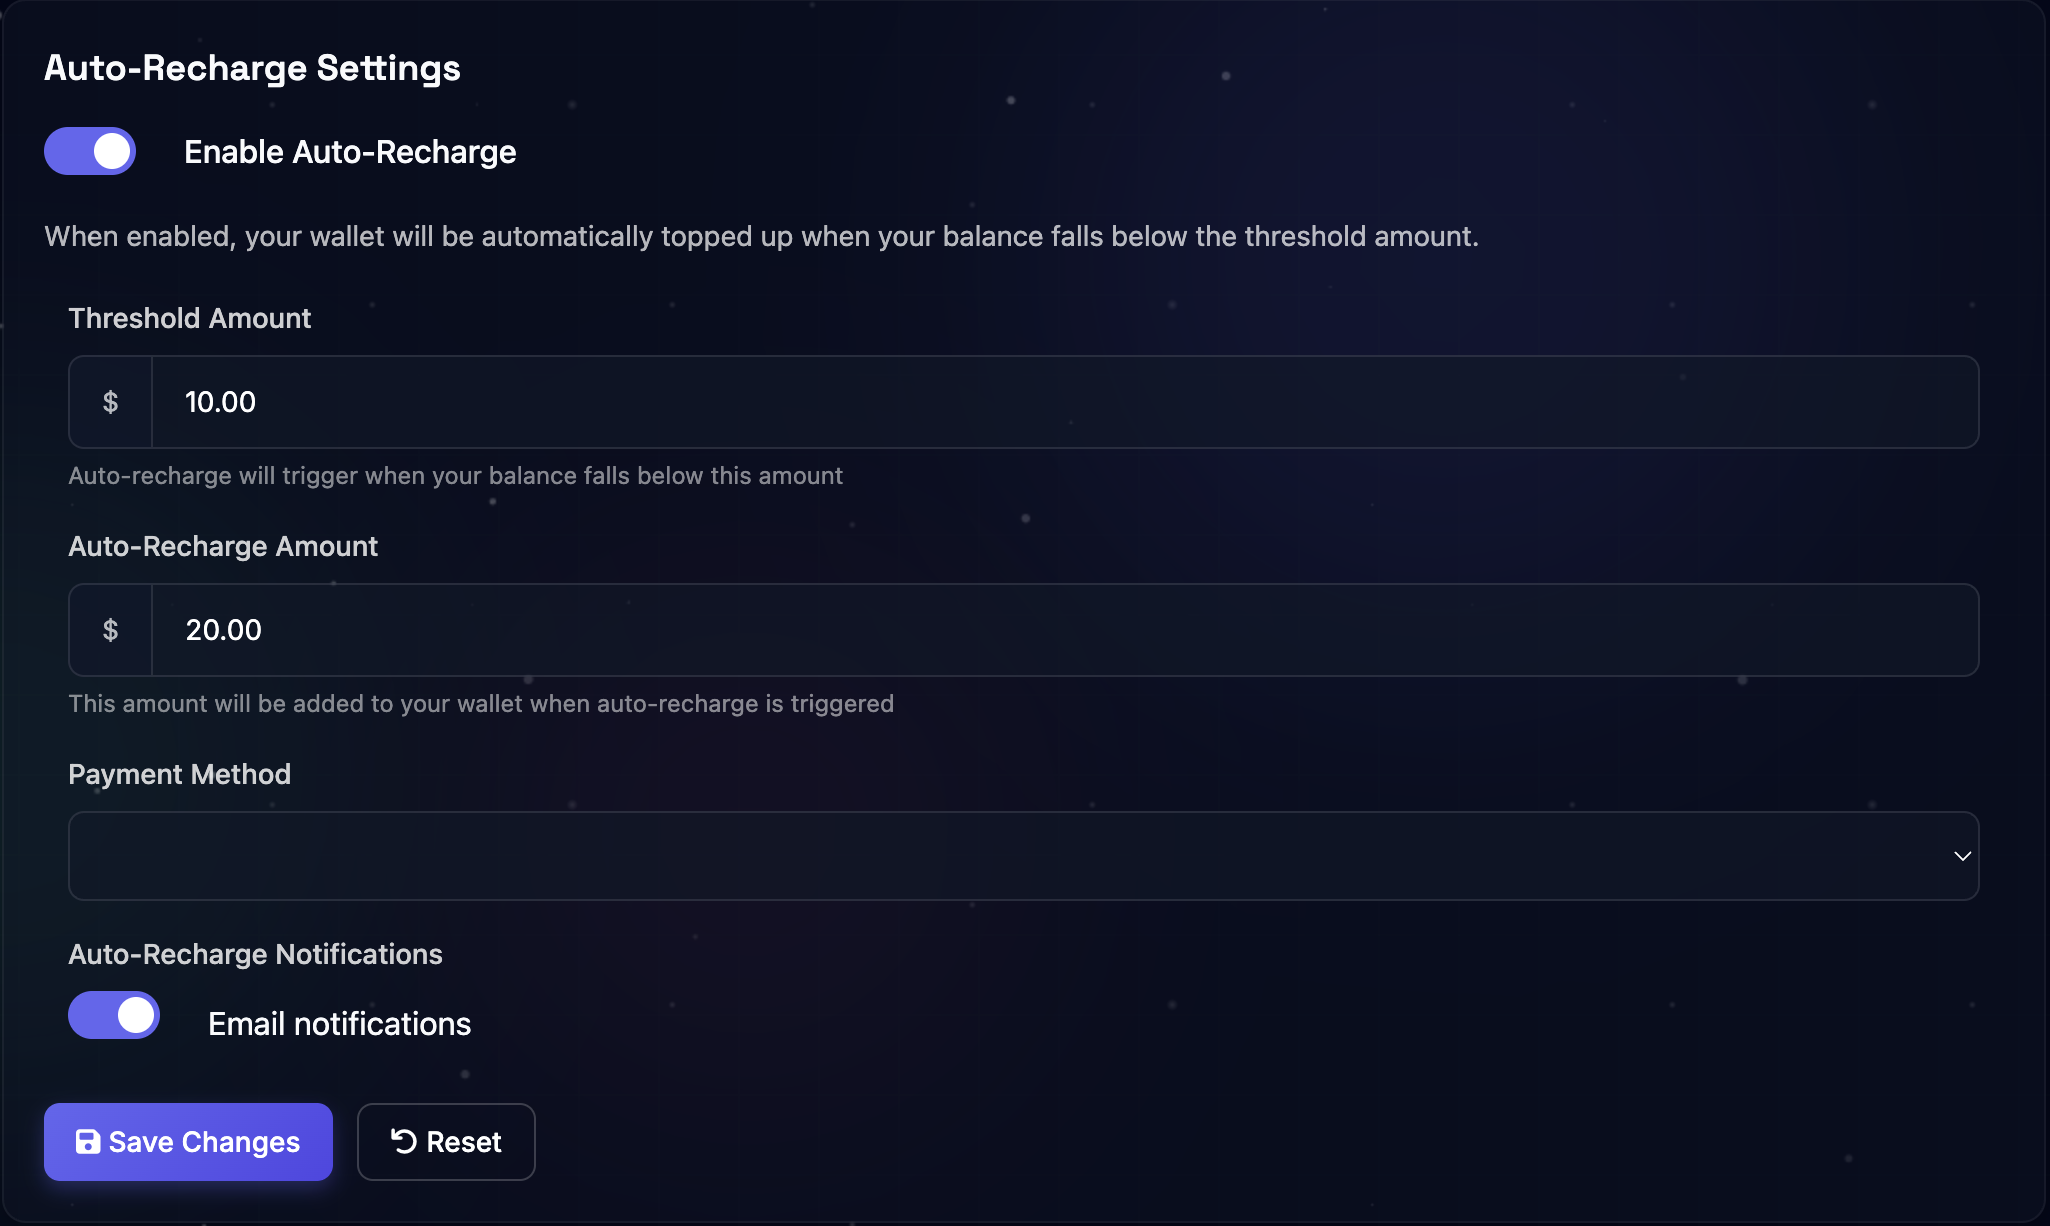
Never run out of funds with automatic recharge:
In the sidebar navigation, click on "Wallet" to access your wallet dashboard.
Once in your wallet dashboard, navigate to the "Auto-Recharge Setting" section.
Toggle on the switch labeled "Enable Auto-Recharge."
Enter the following configuration details:
Click "Save Changes" to apply your settings.

Auto-recharge configuration interface with threshold settings and payment method selection.
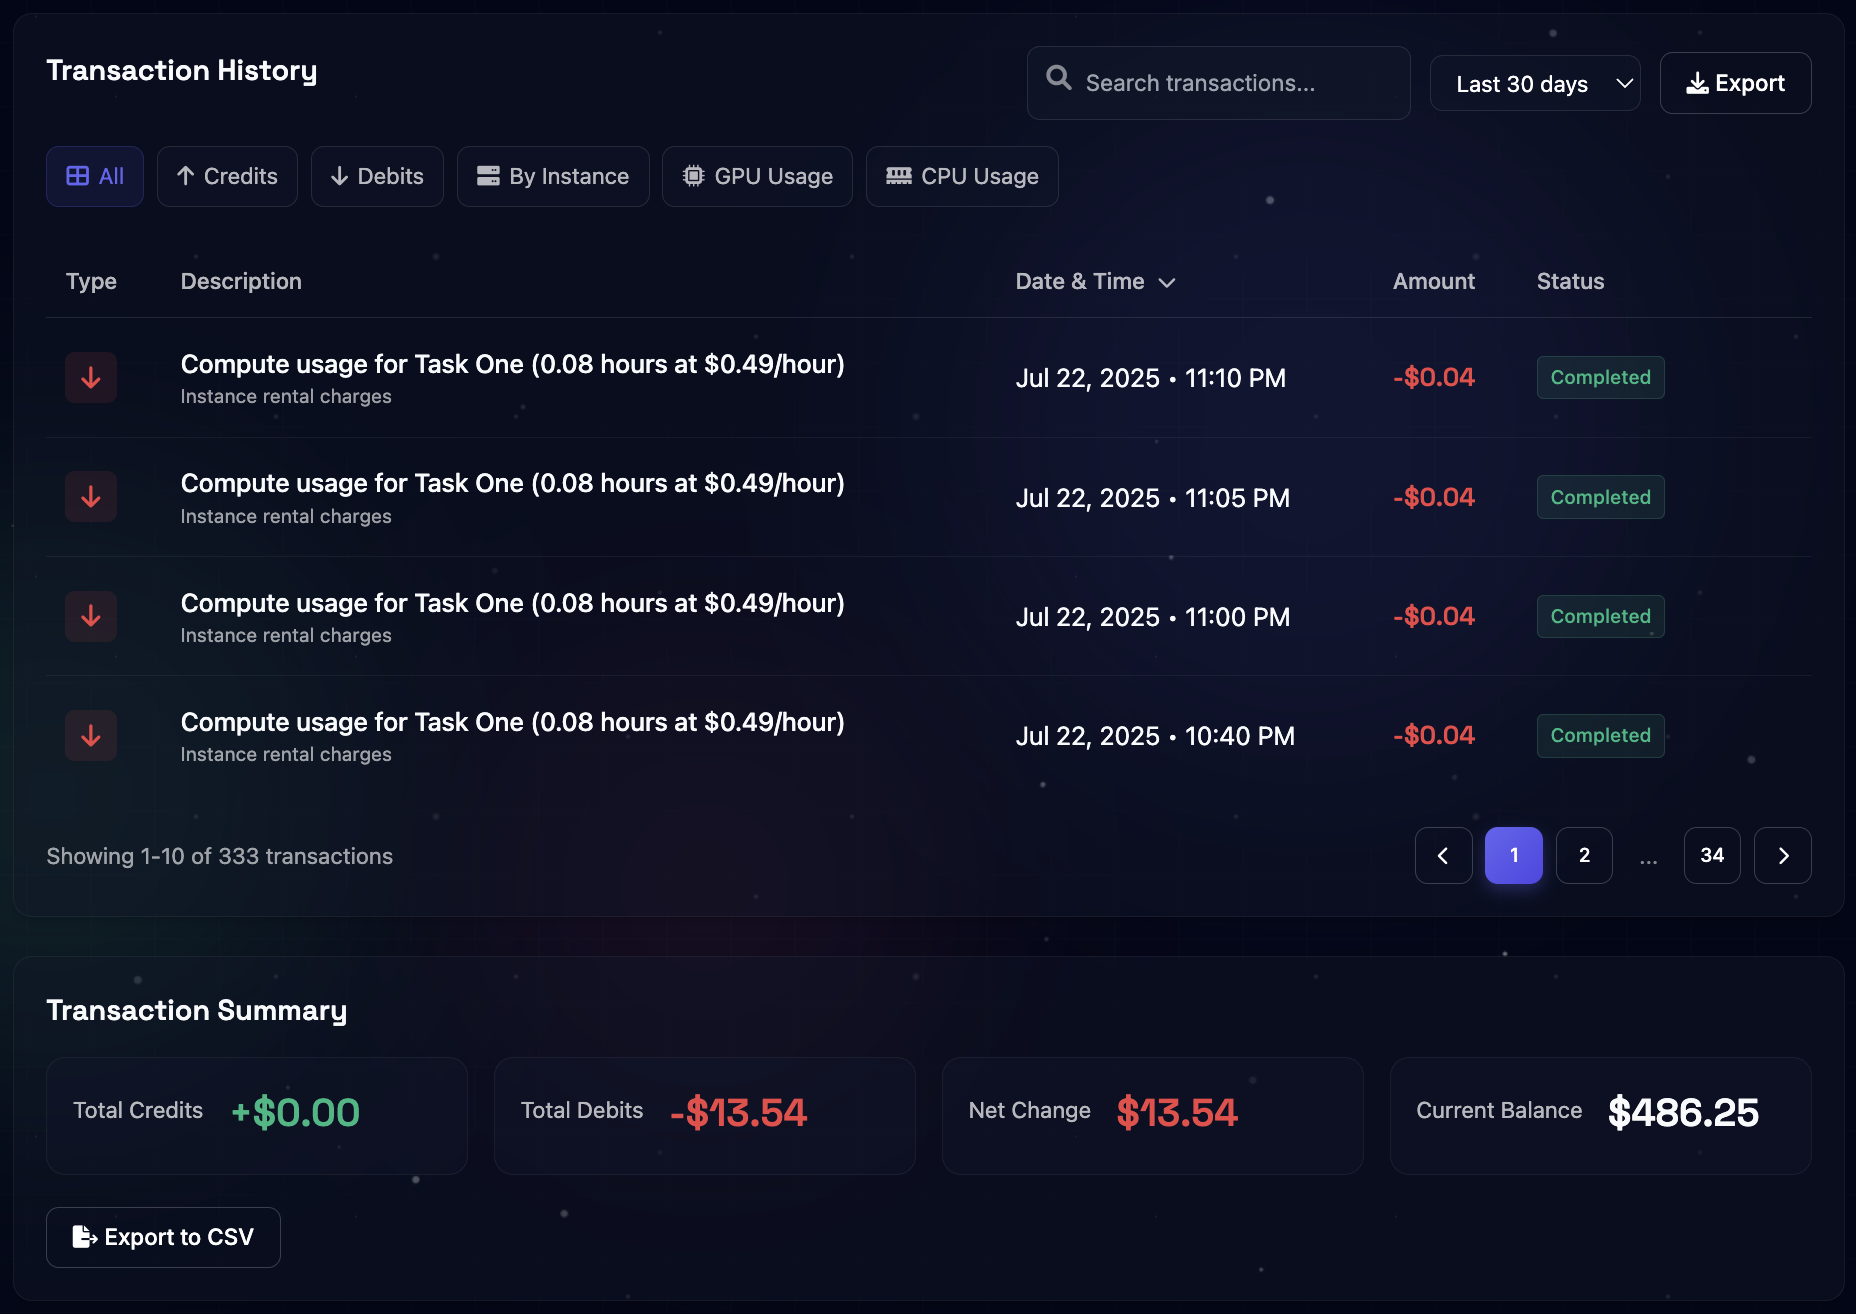
Track all wallet transactions with detailed history and powerful filtering options:
Toggle between credits, debits, instance usage, and GPU/CPU-specific charges to narrow down what's shown in the table.
Use the search bar to find specific transactions and adjust the date range to view historical activity.
Displays transaction details including type, description, date/time, amount, and status (e.g., aggregated daily usage).
Shows totals for credits, debits, net change, and current balance based on the filtered view.
Download your transaction history as a CSV file for personal records or billing review.

Complete transaction history interface with filtering, search, and export capabilities.
We're constantly improving our documentation and would love your feedback for our Beta release. Let us know how we can make it better!